The Struggle Continues…
It’s been over three years since I posted that I had started building a 3D Printer. I have not given up on that endevour, and just wanted to give a quick update of where I’m at with it.
Last I wrote about it I was still printing parts at my local library. I managed to get pretty much all of the parts I neeeded (minus a few) printed before I moved to another town. Unfortunately the new town I was located in did not have a 3D printer so at that point I had to shift focus to gathering all of the vitamins as they call them, that is the mechanical components and fasteners that make up a reprap.
That proved to be very challenging. I had already been looking in the area I had lived in previously and I was having even less luck locally. Every Lowes, Home Hardware, Home Depot, Canadian Tire or anywhere I checked only carried SAE parts. There’d often be a small selection of metric fasteners, but only nuts and bolts starting at M4 or M5, never anything smaller nor any threaded rods.
I had visited stores that specialized in fastners, such as Fastenal and had them refuse to sell to me because they don’t sell directly to the public. The one location that did seem to want to talk to me said he had nothing metric and I should reconsider that plan.
I had also called every metal supplier around. While I had managed to source some smooth rods and threaded rods that were metric it was considerably more expensive than any SAE equivalent. On top of that I found myself a bit overwhelmed on all the options, there were so many different types of steel, coatings and other options that were not really called out in the instructions.
So I found myself very frustrated and overwhelmed for a period and made little progress. I continued to order the electronics I knew I needed, such as the arduino mega, RAMPS 1.4 board and Smart LCD Controller. I picked up a cheap(ish) 24v 15a power supply off Amazon, and a couple of different extruders to play with.
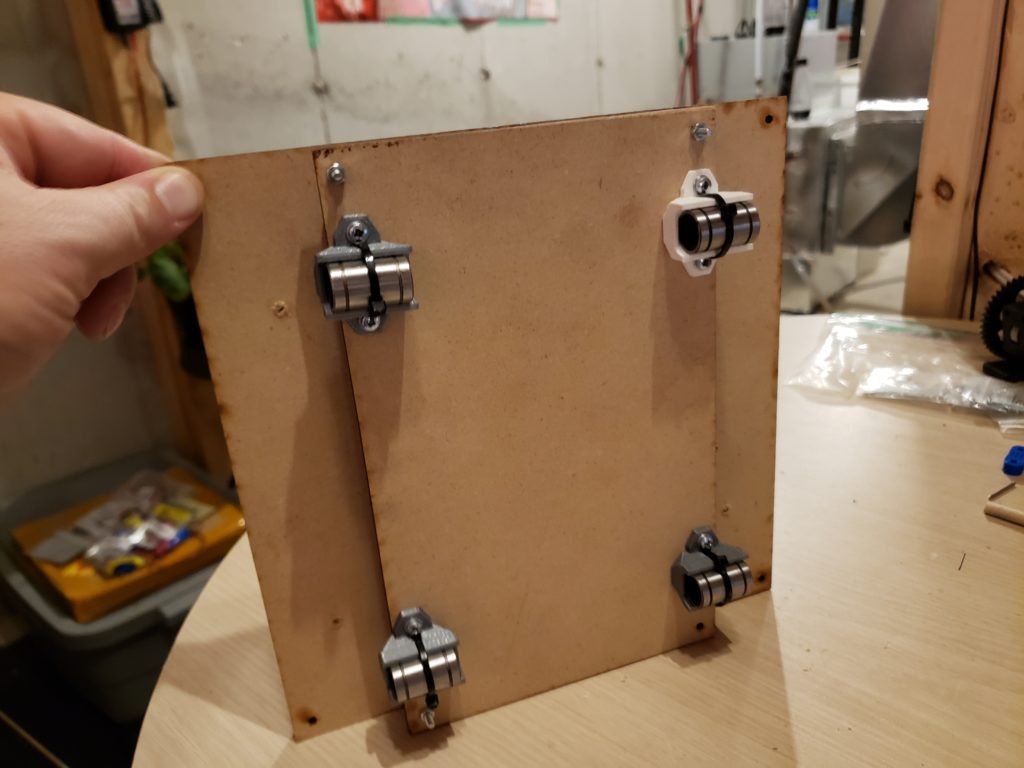
Eventually I was blocked in that I couldn’t think of any electronics to order and it was really just the fasteners and smooth rods I needed. So at that point I caved on a rule I didn’t want to break, which was sourcing things from 3D Printing suppliers rather than from the local hardware store. I was hoping for as much of a build it myself experience as I get, which mean sourcing things myself doing all the smaller jobs myself like hobbing my own bolt and cutting and grinding my own smooth and threaded rods. But since I was at an impasse and I wanted to get things moving forward again I found a somewhat local 3D Printer supplier just outside of Toronto (A2A Printer) where I ordered my 8mm threaded rods and smooth rods, this came in a kit which had them cut to the required sizes and the ends ground smooth (though I did find some rough edges). This in the end I think was a great decision because I have nothing to cut hardened steel with other than a dremel and I imagine this part would have been a nightmare for me. Oh, and best of all this came with a two piece laser cut MDF board for the printing platform, which is something I hadn’t source yet but figured I’d grab locally and hand cut. This will look way better.
Around this time I also ordered a kit of all the nuts, bolts and washers I would need for this project. In the end I think it’s a few pieces short because it didn’t account for my RAMPS case but it will get me 99% of the way there.
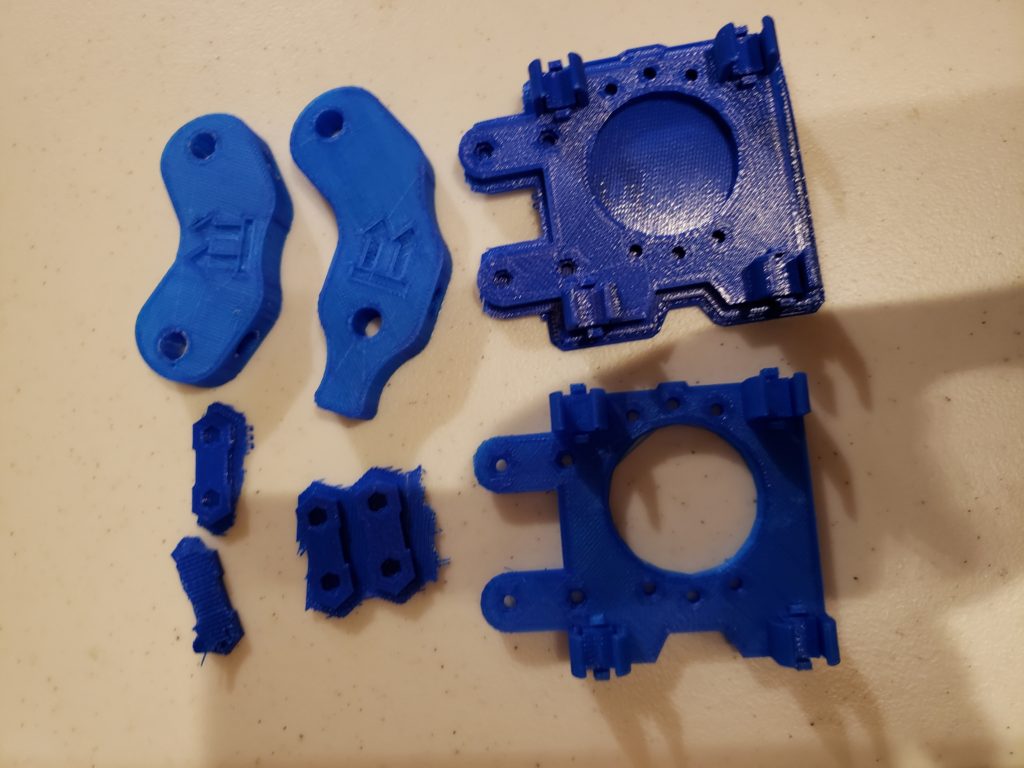
At that point things kind of slowed down again. I started to assemble the frame and realized some of the parts I printed were wrong. I had missed the note saying the extruder files in the github repo had some issues and to use a different set, so mine didn’t have the screw holes to hold the extruder in place and it was also for the wrong sized extruder. On top of that it really needed to be printed in ABS not PLA. On top of that all of my X and Y axis mounts were wrong as they were for an older design that used a copper shim instead of LM8UU bearings, so those needed to be reprinted. Add to that a few parts that just didn’t pass QA in my books and I had quite a few parts I needed printed and no printer.
Shortly after that I moved again. This time to a bigger city with several libraries, all of which had 3D Printers. I was back in business! I quickly signed up and started printing again. However this library charged by the hour (my old one was free) and required that you come in and print it yourself, and sit with it while it prints. That created some issues and when I paid $2 for a small LM8UU mount I realized this was going to get expensive and time consuming.
Finally a break through came. I got talking to an old friend from highschool and college who lived about an hour and a half away and found out he had a 3D Printer. He was also having issues getting it to work. I offered to help him out if he could print some parts for me in return and next thing i know he’s handing me his printer and telling me to take it for as long as I like. That was almost a year ago and I’ve been running that thing non stop. At this point I’ve reprinted almost everything. Anything that comes close to a heat source is now printed in ABS and anything that needed to be reprinted has been reprinted. In addition to that I’ve got his Wanhao Duplicator 4S pretty much dialed in and running great with OctoPrint and will be handing that back to him as a functioning printer with instructions.
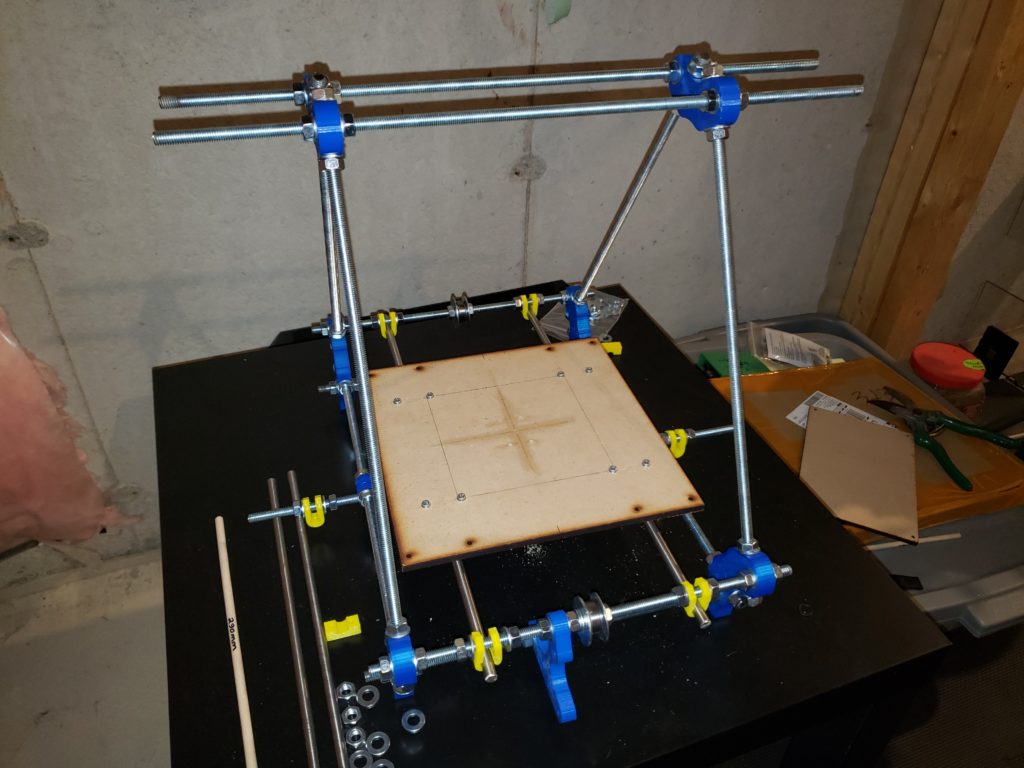
In the last couple of weeks I’ve assembled and aligned the frame. Everything has been carefully measured and then locked in place with locktite. I ran into some issues assembling the X carriage as all the motor mounts I had seemed to have a loose fit on the smooth rods. For some reason reprinting them at 0.4mm layers instead of 0.2mm fixed that issue.
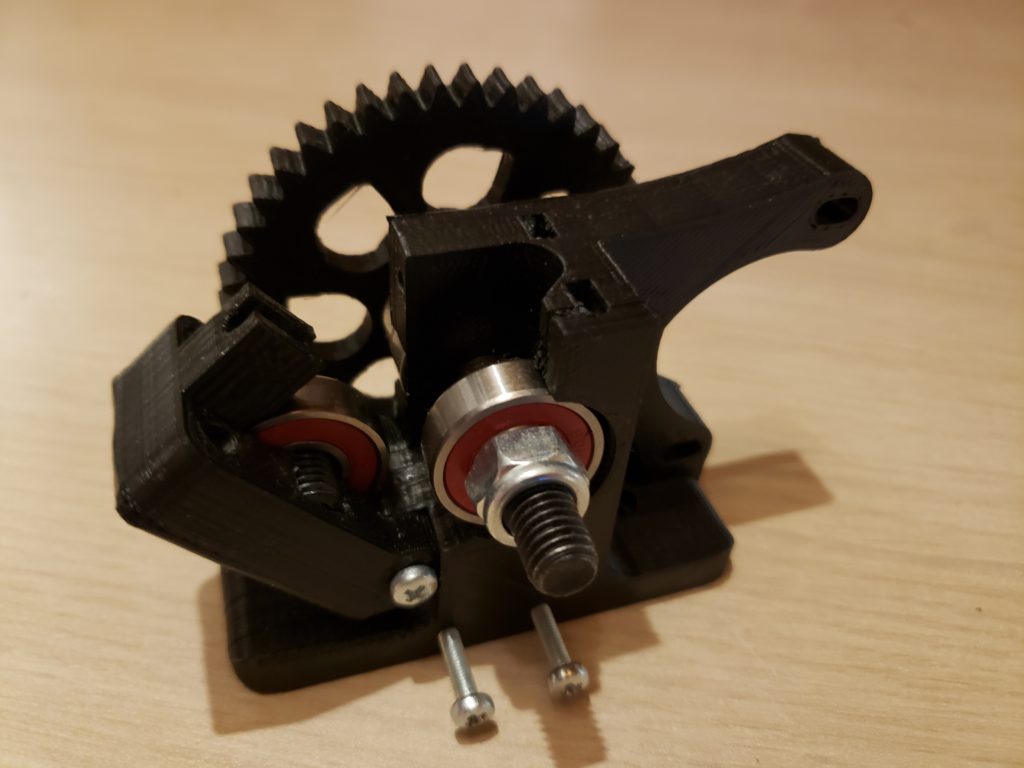
I had assembled the couplers that I printed, which involve hammaring some hex nuts into the plastic so that the screws can thread into it then you basically sandwich the 8mm threaded rod and 5mm stepper motor shaft together and screw it in tight. That just didn’t seem very durable or accurate to me so I sourced some cheaper aluminum couplers off Amazon. For $10 I got four of them delivered to my door, which was twice what I needed.
I also just picked up a new Raspberry Pi 4 with 4 GB of RAM from Amazon. That was more just because I already have a 1, 2 and 3 and just wanted to play with a 4. But also because my Pi 3 at this point has been an OctoPrint server for the Duplicator 4S and I also use it a lot as a desktop when near the printer. I found it just didn’t handle multiple tabs open in a browser or any sort of youtube videos. So I swapped it out for the new 4 GB model which I must say handles it fantastically. It also seems much faster when browsing the OctoPrint site, as it was quite slow to load on the old Pi. As for the old Pi 3, well that is still on standby for when I get the new printer up and running as they will each have their own Pi. If you’re thinking about building or buying a 3D printer I highly recommend OctoPrint, it allows you to manage your printer remotely as well as record time lapses of your prints and get all sorts of charts and other history on your prints — but I’ll write a post about that another day.
I also recently ordered some precut borosilicate glass from Amazon. Originally I had salvaged some glass from a picture frame and had attempted to cut it myself as I had inherited a glass cutter from my grandfather. That failed miserably and I broke the glass. So for only $13 I figured precut glass was a worthwhile expense, plus it’s borosilicate so it should handle the expansion and contraction from the heat plate without concern.
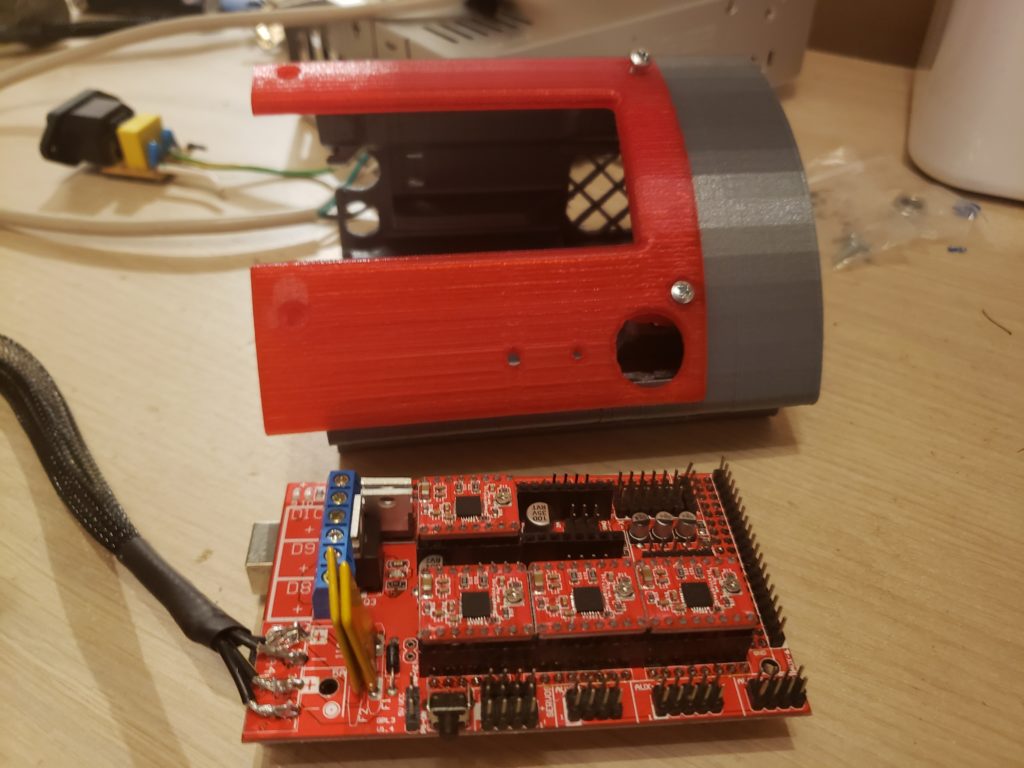
All I really have todo at this point is some more soldering to get the hot bed wired up then mount that and the glass on the platform. From there it’s a lot of wiring and testing of the RAMPS board. I have a beautiful case for it all printed up and I’m justing waiting on some small fans and heatsinks I ordered to come before I stuff it all in there. I need to resecure the print bed and fix a small alignment issue on my Z axis.
After that it will be a lot of testing of the electronics, then attaching the extruder and testing that. Then hopefully some actual printing! At this point I am aiming to have a succesful print by the end of the year, so wish me luck!

A seasoned Senior Solutions Architect with 18 years of experience in technology design and implementation. Renowned for innovative solutions and strategic insights, he excels in driving complex projects to success. Outside work, he is a passionate fisherman and fish keeper, specializing in planted tanks.